How to Make Custom Brass Coins with a Fiber Laser
On this page
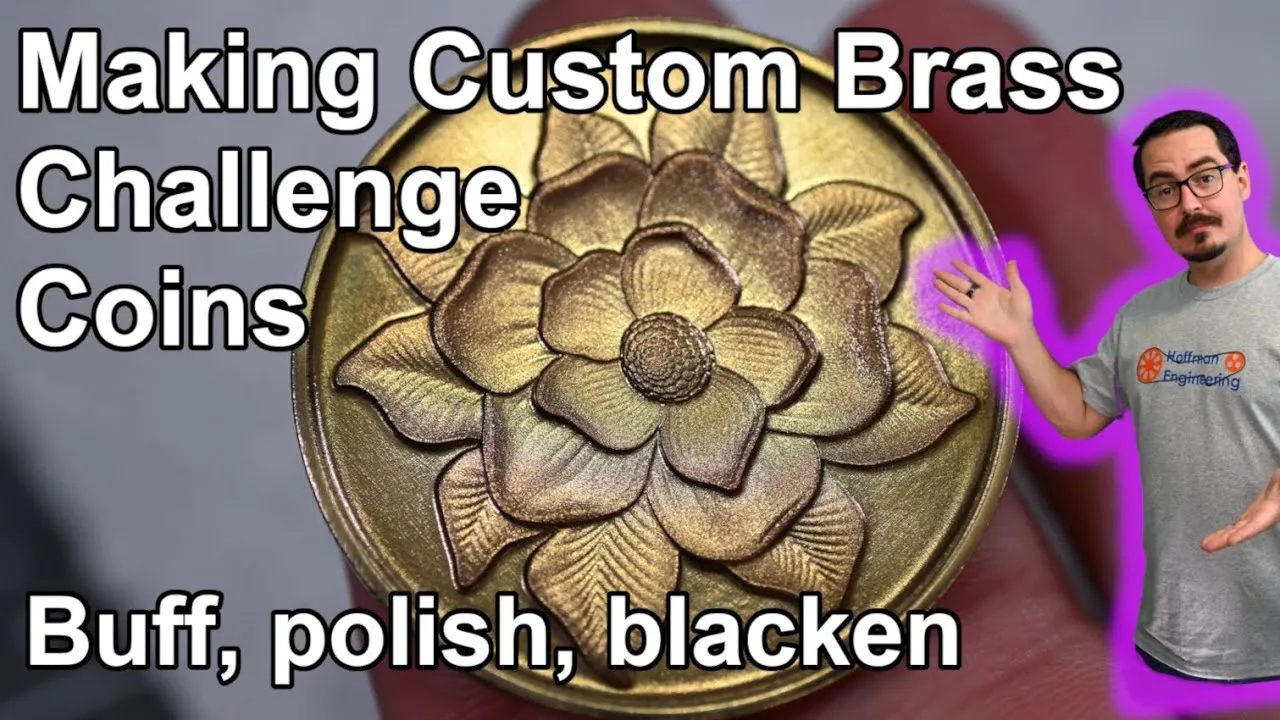
Deep engraved brass coins look great straight off a fiber laser, but the raw surface is dark and dusty, and the rims carry burrs. I engraved four all-brass coins on the Monport GA60 MOPA fiber laser, then worked through wire wheels, Brasso, Dremel power polishing and a brass blackening agent to see how much better they could look. This is the full process, including the mistakes, and which finish worked for which design.
Step 1: Buy All-Brass Coin Blanks
The blank matters more than anything you do afterwards. A lot of coins sold online as brass are brass-coated pot metal, and they engrave terribly. You want solid brass all the way through.
I used these all-brass coin blanks. Whatever you buy, get them from a source you trust.
Step 2: Deep Engrave the Coins with LightBurn 3D Slice
I loaded the blanks on the Monport GA60 and ran the depth engravings with LightBurn’s 3D Slice feature.
| Setting | Value |
|---|---|
| Method | LightBurn 3D Slice |
| Layers | 256 |
| Speed | 1500mm/s |
| Cleaning pass | Every 5 layers |
| Time per job | A little over 2 hours |
| Resulting depth | About 2mm |
I made two designs: a flower and a spider with cobwebs. Right off the laser, all four coins already looked impressive. The goal from here was to make them look even better.
Step 3: Clean the Surface with a Brass Wire Wheel
The first coin was a flower. I put a cup-shaped brass wire wheel in a Dremel. It flares out when it spins, which helps it reach into the design. I moved it over the surface with light pressure.
After a couple of minutes, the coin had a shiny, uniform surface. The wheel knocked down the burrs on the rim and removed the dark raw laser finish from the flat areas.
On the spider coin I tried both the cup wheel and a straight wire wheel. The cup wheel worked better. Even with the wire wheel alone, the spider’s surface was much more uniform than it was straight off the laser.
Step 4: Hand Polish with Brasso
Next I used Brasso and a microfiber cloth, with a generous amount of polish, rubbing in circles for a few minutes.
On the flower coin, it didn’t change much compared to the wire wheel. Mostly it removed dust the wheel left behind. On the spider coin, the hand-polished result next to an unpolished original was a night and day difference, though it was harder to get the cloth into the fine cobweb details.
Step 5: Power Polish with the Dremel
For power polishing I used more Brasso on Dremel polishing wheels.
This is where I made my first mistake. The polishing wheels wear down quickly, and I didn’t notice that the cone-tipped one had worn down to the mandrel. I was rubbing bare metal against the brass, which left deep scratches on some of the flat areas. Check your wheels often.
I switched to a fresh polishing pad and worked the scratches out over about 5 minutes. The flat sections came out well polished. The rest of the flower kept most of its original texture, so I didn’t lose any engraved detail, but the change wasn’t as dramatic as I expected.
On a second flower coin, the full sequence of wire wheel, hand polish and power polish took about 10 minutes and gave a bright, shiny coin. On a second spider coin, I took my time on the Dremel step, and that gave the most even result of the detailed coins: polished high spots, and some of the lower areas brightened too.
Step 6: Blacken the Brass for an Antique Finish
A brass blackening agent oxidizes the surface quickly and leaves a dark, aged patina. I applied it with a paper towel. It reacted much faster than I expected and was hard to apply evenly. What worked was soaking the paper towel so enough liquid reached the coin and got into every recess. That gave a very dark, mostly even surface.
The best part came next. Wiping the coin with a dry microfiber cloth removed the black from the high points but left it in the low areas and along the edges. That looks like a coin someone has carried for decades.
Blackening a Detailed Design
On the first spider coin, I skipped the power polish and went straight from hand polishing to blackening. That was a mistake. Surface tension pulled the liquid into the small cobwebs, and the coin came out blotchy. Hand polishing afterwards took some black off the high points, but the low points stayed uneven.
My theory was that the surface needed a better polish for the blackening agent to work evenly. To rescue the coin, I cleaned off as much black as I could by hand, then polished it with Brasso on the Dremel. Some black stayed in the details, which is a nice look on its own if you want them subtly highlighted. I wanted it darker, so I applied more blackening agent and let it soak in until the whole surface was black, dried it, and buffed the high points with a microfiber cloth.
Results: Which Finish Works Best
I ended up with a polished and a blackened version of each design.
- Antique flower coin: my favorite. The blackening picks out every edge.
- Detailed designs like the spider: the weathered look is much harder. To get an even coat I had to make the surface so dark that polishing afterwards couldn’t bring the high points back.
- For detailed coins, a wire wheel followed by a power polish is the best finish.
Going forward, I plan to give fiber laser test pieces at least a quick wire wheel pass in my reviews. It removes the dust and burrs so the laser’s detail shows, while the piece keeps a mostly raw look.
The GA60 cut through this brass with no trouble, and I had good results on aluminum, steel, plastics, stone and leather too. My Monport GA60 review covers all of that. Monport’s store no longer lists the GA 60W, and its product link now redirects to the GA 100W.
If you have finishing techniques for engraved brass, I’d like to hear them. I’m no jeweler, and I’d like to come back to this with better results.
This post contains affiliate links. If you buy through them, I may earn a small commission at no extra cost to you. Monport provided the GA60 for review.
FAQ
How do you deep engrave a brass coin with a fiber laser?
I used LightBurn's 3D Slice feature on a 60W MOPA fiber laser. Each coin took 256 layers at 1500mm/s, with a cleaning pass every 5 layers, and ran for a little over 2 hours. The finished engravings are about 2mm deep.
Why does my brass coin blank engrave badly?
Many blanks sold as brass are brass-coated pot metal, and they engrave poorly. Buy all-brass blanks from a source you trust.
How do you polish a laser engraved brass coin?
Start with a cup-shaped brass wire wheel in a Dremel, using light pressure, to remove the dark laser surface and knock down burrs on the rim. Then hand polish with Brasso and a microfiber cloth, and finish with Brasso on Dremel polishing wheels. Watch the wheels, because they wear down fast and the bare mandrel will scratch the brass.
How do you give laser engraved brass an antique look?
Polish the coin first, then soak it with a brass blackening agent until the whole surface is dark. Dry it, then wipe it with a dry microfiber cloth. The cloth lifts the black off the high points and leaves it in the recesses and edges, which gives an aged, handled look.
Does blackening work on highly detailed engravings?
It's harder. On the detailed spider coin, surface tension pulled the blackening liquid into the fine cobwebs and left it blotchy. Getting an even coat meant darkening the coin so much that buffing afterwards couldn't lighten the high points. For detailed designs, a wire wheel and power polish alone looked best.