Creality Otter Lite Review: Wireless 3D Scanning, Tested
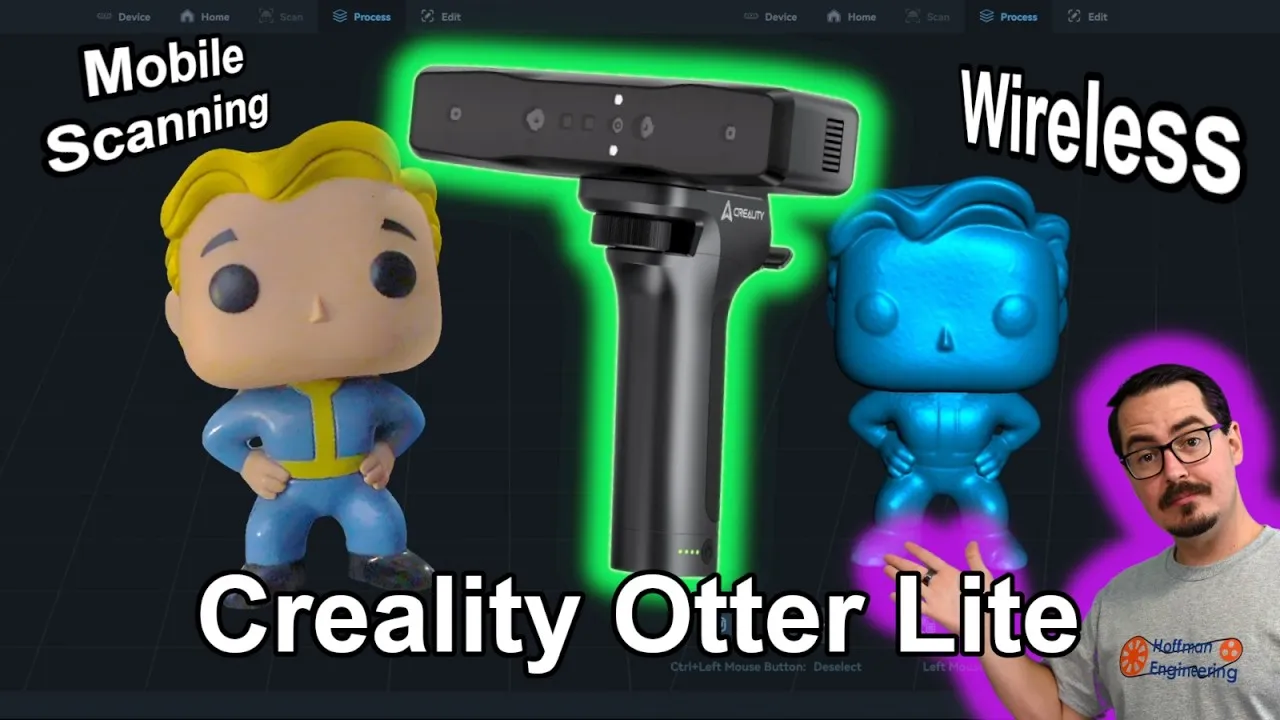
Wireless scanning from a laptop is smooth and the scan quality is strong for a hobbyist scanner, from miniatures to a car. Phone and USB scanning were unreliable in my testing, so buy it where you can return it.
Check price at CrealityOn this page
The Creality Otter Lite is a wireless-first 3D scanner: screw it onto a battery handle, connect over Wi-Fi, and walk around anything from a resin miniature to the front of a car with no cable in the way. After a month of testing, this Otter Lite review covers the scan results, all three ways to connect it, and the problems that keep it from an easy recommendation.
What’s in the Otter Lite Case
The scanner ships in a hard-backed carrying case with a fabric exterior, a top handle and two zippers. Inside, mesh pouches hold the accessories and everything is bagged.
You get the Creality owl statue, which comes with all of Creality’s scanners. It has plenty of detail, so it’s a good first test. You also get the Lite Bridge battery handle, a magnetic phone clip, two USB cables and 10 sheets each of small and medium marker dots, 980 small and 500 medium in total.
Most of the time you won’t need the markers. The Otter Lite is built for markerless scanning, and I only wished for them on large flat surfaces.
The Lite Bridge: Battery Handle and Phone Mount
The Lite Bridge is what makes the Otter Lite wireless. It’s a handle with a 3400mAh lithium battery, charged over USB-C near the top. Creality claims 3 hours of battery life, and that matched my testing. It lasted longer than I expected.
The handle supports 20W fast charging, which Creality says gets it to 80% in one hour. A four-LED battery indicator sits at the bottom.
The scanner screws onto the top of the handle and connects through six pads on its base. A magnetic clip holds your phone on the handle for phone scanning.
If you’d rather scan tethered, the included cables connect the scanner to your computer: a USB 3.0 Type-A to USB-C cable with screws to lock it into the scanner, plus a second cable for extra power when your computer’s ports are underpowered.
Otter Lite Specs: Near-Infrared, Four-Lens Stereo Vision
The Otter Lite is a near-infrared binocular structured light scanner. An infrared projector casts a pattern onto the object, and four infrared sensors read how that pattern bends over the surface to work out depth. That four-lens stereo vision is what lets one scanner handle both small and large objects.
Near infrared also copes well with black and metal surfaces without scanning spray, which the results below bear out.
Creality claims 0.05mm accuracy, compared to 0.02mm for the original Creality Otter. That’s still very accurate for a handheld scanner.
On the front, two white LEDs and an RGB camera capture 24-bit color for textures. Eight more infrared LEDs around the edge light up marker dots when you use them.
The back has physical buttons to start and stop a scan, plus exposure up and down buttons. I prefer these to the original Otter’s capacitive buttons, because the click tells you the press registered. There’s a quarter-twenty tripod thread on the bottom.
Wireless Scanning From a Laptop: The Otter Lite at Its Best
Press the power button on the Lite Bridge and the scanner turns on along with its own Wi-Fi 6 network. Connect your phone or computer to it and you’re scanning wirelessly.
Scanning from my laptop is my favorite part of the Otter Lite. Join the Lite Bridge’s network and CrealityScan connects to the scanner on its own. The experience was smooth, averaging about 15 frames per second over Wi-Fi.
Not being tethered changes how you scan. You move around the object freely instead of managing a cable, and that made every scan easier. Almost every scan in this review was done this way, then processed with CrealityScan’s one-click defaults.
Mobile Scanning With the CrealityScan App
The CrealityScan app for iOS and Android makes the Otter Lite fully portable. Clip your phone onto the Lite Bridge, join the scanner’s network, and you can scan and process on the phone.
How well that goes depends on your phone. Creality recommends 6GB of RAM and at least a Snapdragon 888+ or an iPhone 13 with the A15 Bionic.
My Pixel 7 has 8GB of RAM and a Tensor G2, roughly a Snapdragon 888 equivalent. Small objects scanned consistently at 4 to 5 frames per second. But medium and large scans often stopped with a “Real-time memory is exhausted” error, even after a reboot with screen recording off. For bigger objects on a phone, you’ll want more RAM.
You can process a scan on the phone or send it to your computer. Import From Mobile failed for me a couple of times with a “This folder is empty” error, apparently on scans that had run out of memory and didn’t save correctly.
Mirror Mode: Your Phone as a Screen
Mirror Mode splits the job. Your laptop does the processing, and your phone shows the live scan view while you move around.
Both devices join the Lite Bridge’s Wi-Fi. CrealityScan then starts a small server on the laptop and shows its address as a QR code. Your phone opens that page, which mirrors a streamlined mobile view of the desktop app.
The catch: use your phone’s normal QR code reader. The CrealityScan app has a QR scan button on its main page, but it doesn’t work for this. I thought Mirror Mode was broken until I tried a regular reader.
CrealityScan Software and Post-Processing
I like CrealityScan as a scanning package. It handles firmware updates and calibration, and it has helpful tools while scanning. It can ignore large flat areas, so the table under your object stays out of the scan. Its anti-shake algorithm keeps tracking smooth.
If you move too fast and lose tracking, point the scanner back at an area you’ve already captured and it picks up again within a couple of seconds.
That tracking recovery changed how I scanned. Normally you scan one side, stop, flip the object, scan again and merge the scans later. With the Otter Lite I paused, flipped the object and resumed the same scan. It almost always picked up where it left off, so there was nothing to merge.
Post-processing goes from raw data to point cloud, to a watertight mesh, to a color texture. Lasso tools make cleanup easy, each step has settings, and a one-click button runs it all. On my mid-range laptop processing took 5 to 15 minutes, depending on the object.
Otter Lite Scan Results: Small and Detailed Objects
Owl statue: It captured the feathers well. Next to the original Otter’s scan, the Otter Lite mesh has slightly less detail.
Vault Boy figure: An easy scan. The black eyes and shoes came through without touching exposure. The shoulders merged into the bottom of the head, though.
Kerbal figure: The back of the helmet is hidden from view, and CrealityScan did a good job filling it in. The color texture is good too.
Resin crossbow scene: This 3D printed scene is packed with detail. The Otter Lite missed the fine facial details but surprised me by capturing the small crossbow pieces.
Voronoi Bulbasaur: Nothing but thin, overlapping tubes, a geometry some scanners hate. The Otter Lite rarely lost tracking, and processing kept every tube separate, with one mesh defect around an eye. The original Otter could pick out individual layer lines on this print. The Lite doesn’t show that level of detail.
Translucent green skull: Hundreds of tiny holes, printed in translucent jade filament. Very few scanners I’ve tested could handle it. The Otter Lite recognized the holes, filling in a few at the back, and closed off the inside of the front face where I could have scanned better. A great showing on a worst-case object.
Dragon statue: Thin wings and overlapping geometry gave it no trouble. It even captured defects from the original print, though not as cleanly as the original Otter did.
Scanning Black, Shiny and Reflective Objects Without Spray
This is where near infrared earns its place.
Master Chief helmet: The visor is highly reflective, the kind of surface you’d normally coat with scanning spray. The Otter Lite scanned the whole helmet, inside and out, with no spray, and it came out great.
Gold lion statue: Shiny gold with reflective embellishments. It handled them perfectly. The mesh is superb, and the texture shows what the RGB camera can capture.
PlayStation controller: Black objects are hard for structured light scanners. The Otter Lite captured all of it, including under the thumbsticks, and the texture looks great. The bare mesh has a slight surface ripple, more noise than the other scans.
Stadia controller: The white Stadia controller was as easy to scan, with much less mesh noise. So the Otter Lite can handle black objects, but it works harder for them.
Lego painting: Flat or round objects without unique geometry can confuse tracking. In Geometry mode the scan spun around. Texture mode tracks with color data instead and fixed it.
Scanning People: Face and Body Modes
The Otter Lite’s near-infrared light is eye-safe, so it works well for scanning people.
Face Scan mode ignores hair and was very quick. The mesh and texture were both good, although the texture hides some flaws in the mesh. Take glasses off first, because it doesn’t handle them well.
Body Scan mode captures the full body, clothing and hair. I built a turntable for my subjects, but with wireless scanning you could walk around them instead. It worked with hair up in a bun and hair down, took about a minute and a half, and coped with small movements. The texture defects came from my turntable: the studio lighting changed brightness as it rotated. Tattoos came through well in the color texture.
Scanning a Car With the Otter Lite
The Otter Lite scanned the front of my car without markers. It worked harder on the chrome grille but still captured it. It only struggled on the large flat hood, where there wasn’t enough unique geometry to track. For flat panels like that, use the included marker dots.
An interior door panel was no problem at all. It captured the whole panel cleanly.
The Problems: USB Tethering and Phone Memory
Beyond the Pixel 7 memory errors, the Otter Lite’s USB connection on Windows was flaky.
CrealityScan warns about USB connection issues at launch and prompts a firmware update. Even after updating, the scanner saw only one of my four USB ports as USB 3.0 and treated the others as USB 2.0. On that one port, it still disconnected and reconnected on its own. I couldn’t complete a scan over USB, and I couldn’t run calibration, which requires USB.
I didn’t have this problem with the original Otter. To rule out the latest CrealityScan, I tested the original Otter again on the same computer: all four ports showed as USB 3.0 and it stayed connected. So the problem is specific to the Otter Lite’s firmware or hardware.
Otter Lite Price
The Otter Lite was $699 at the time of recording, about $150 less than the original Otter. Creality’s store now lists it at $759. The same page also offers a wired-only Otter Lite Basic, which I didn’t test. Keep in mind that the USB connection is the one that gave me trouble.
Verdict: Should You Buy the Creality Otter Lite?
When it worked, the Otter Lite was excellent for a hobbyist handheld scanner. Creality’s 20 to 2000mm object range held up: it did as well on resin miniatures as on the front of my car. It handled black, metal and reflective objects with no scanning spray, and wireless scanning from my laptop was smooth and satisfying.
But “when it worked” carries a lot of weight. Of the three ways to connect, only wireless to a laptop was reliable for me. Phone scanning ran out of memory on bigger objects, though my Pixel 7 sits at the edge of the recommended specs and a stronger phone may do better. USB kept disconnecting. The original Otter doesn’t have these problems, so I hope firmware updates fix them.
The Otter Lite makes the most sense if you want to get into 3D scanning with a wireless-focused device and plan to scan from a laptop. I like the scanner a lot, but I’d expect other people to hit the same issues I did. Buy it somewhere with a good return policy, test it with your own phone and computer, and keep it once you know it works for you.
Check the latest price on the Creality Otter Lite
Pros and cons
✓ Pros
- Wireless scanning to a laptop was smooth, averaging about 15 frames per second
- Scanned black, metal and reflective objects with no scanning spray
- Handled everything from resin miniatures to the front of a car
- Fast tracking recovery lets you pause, flip the object and resume the same scan
- Lite Bridge battery lasted about the claimed 3 hours
- Eye-safe near infrared with dedicated face and body scanning modes
- Physical buttons give clear click feedback
- One-click processing finished in 5 to 15 minutes on a mid-range laptop
✗ Cons
- USB tethering on Windows kept disconnecting, so I couldn't finish a scan or run calibration over USB
- Calibration requires the USB connection
- Phone scanning on a Pixel 7 ran out of memory on medium and large objects
- Slightly less fine detail than the original Otter
- Black objects show more mesh noise than white ones
- Large flat panels like a car hood need marker dots
- Mirror Mode needs a separate QR code reader, not the app's own scanner
Specs
| Scanning Technology | Near-infrared binocular structured light, four-lens stereo vision |
|---|---|
| Accuracy | Up to 0.05mm (claimed) |
| Object Size | 20 to 2000mm (claimed, held up in testing) |
| Scan Speed (tested) | About 15fps wireless to a laptop, 4 to 5fps on a Pixel 7 |
| Color Capture | RGB camera, 24-bit color |
| Connectivity | Wi-Fi 6 via the Lite Bridge, or USB 3.0 cable |
| Lite Bridge Battery | 3400mAh, about 3 hours (claimed), 20W fast charging |
| Markers Included | 980 small and 500 medium marker dots |
| Software | CrealityScan (desktop, plus iOS and Android app) |
Where to buy
- Creality Otter Lite 3D Scanner$759 →
Prices may have changed since this review.
FAQ
Is the Creality Otter Lite worth it?
The scan quality is strong for a hobbyist handheld scanner, and wireless scanning from a laptop worked well for me. But only one of its three connection methods worked reliably in my testing. Phone scanning hit memory errors and USB kept disconnecting. If you want a wireless-focused scanner, it's a good pick, as long as you buy it somewhere you can return it after testing on your own phone and computer.
Can the Creality Otter Lite scan black and shiny objects without spray?
Yes. I scanned a black PlayStation controller, a Master Chief helmet with a reflective visor and a shiny gold lion statue with no scanning spray. Black objects do come out with a bit more surface ripple in the mesh than white ones.
What phone do you need for the Otter Lite?
Creality recommends 6GB of RAM and a Snapdragon 888+ or an iPhone 13 with the A15 Bionic. My Pixel 7 (8GB of RAM, Tensor G2) scanned small objects fine at 4 to 5 frames per second, but medium and large scans often failed with a memory error. For bigger objects on a phone, get one with more RAM.
How does the Otter Lite compare to the original Creality Otter?
Creality claims 0.05mm accuracy for the Otter Lite against 0.02mm for the original Otter, and in my side-by-side scans the Lite shows slightly less fine detail, such as 3D print layer lines. The Lite has physical buttons and a battery handle for wireless scanning. At recording it was about $150 cheaper. The original Otter also had none of the USB problems I hit with the Lite.
How big an object can the Otter Lite scan?
Creality rates it for objects from 20 to 2000mm, and that matched my testing. It scanned resin miniatures and the front of my car without markers. Large flat areas like a hood need marker dots, which are included.
This Creality Otter Lite was provided by Creality for review. Creality didn't pay for this review. This post contains affiliate links. If you purchase through them, I may earn a small commission at no extra cost to you. All opinions are my own.