Wizmaker Artisan 01 Review: Can a $599 CNC Cut Aluminum?
A rigid, easy-to-set-up desktop CNC for hobbyists and small shops cutting mostly wood and plastic. The 300W spindle will cut aluminum, but slowly, so get the 500W version if metal is your main use.
Check price at WizmakerOn this page
Can a $599 desktop CNC cut aluminum? That’s the question I had when Wizmaker sent over the Wizmaker Artisan 01, a benchtop router with dual-nut lead screws on every axis and a 300W spindle. This Wizmaker Artisan 01 review covers a month of cutting poplar, oak and 6061 aluminum, a few broken bits, one odd moment while homing, and the upgrade I’d consider before ordering.
What the Wizmaker Artisan 01 Is
The Artisan 01 is a 3-axis desktop CNC router. You design a part in CAD, generate toolpaths in CAM software, and the machine cuts it out of wood, plastic or soft metals.
It comes in two versions: the standard 300W spindle, which is the one reviewed here, and an upgraded 500W version. Wizmaker also sells the 500W spindle as a standalone upgrade kit, so you can start with the 300W and move up later.
Frame, Linear Guides and Lead Screws
The aluminum frame arrives mostly pre-assembled. The X and Z axes ride on MGH12 linear guides, and the Y axis uses a 16mm linear shaft. Motion comes from T8 dual-nut lead screws on X and Z and a T12 dual-nut lead screw on Y.
The dual-nut design is meant to remove backlash, the slop you get when an axis reverses direction. Motion felt tight and consistent through all of my testing.
Lead screws on every axis are a step up from belt-driven CNCs at this price. The trade-off is slower max speeds. I’d rather have the rigidity and precision, so that’s a trade I’m happy to make. Net weight is 26.8kg, a little under 60 pounds, which tells you something about how rigid the frame is for a benchtop machine.
300W Spindle and True ER11 Collet
The 300W spindle tops out at 12,000 RPM and has a 52mm body. Wizmaker rates the radial runout at 0.01 to 0.03mm.
The collet deserves a callout. It’s a true ER11, not the “ER-style” collet you find on a lot of smaller routers and die grinders. Real ER11 collets in other sizes will seat properly, with the runout and clamping force you’d expect. Mine came with a 1/8 inch collet, and that’s what I used for every test. You can buy other ER11 collets if you need different bit sizes.
300 watts is on the low end for a desktop CNC spindle, and you’ll feel that in some materials. Hardwoods are fine. Soft aluminum is doable, but you have to slow way down.
Work Area and Workholding
The work area is 420 x 420mm with 90mm of Z travel. That’s a good size for small signs, jigs, custom hardware and prototype parts, and plenty of height for most stock.
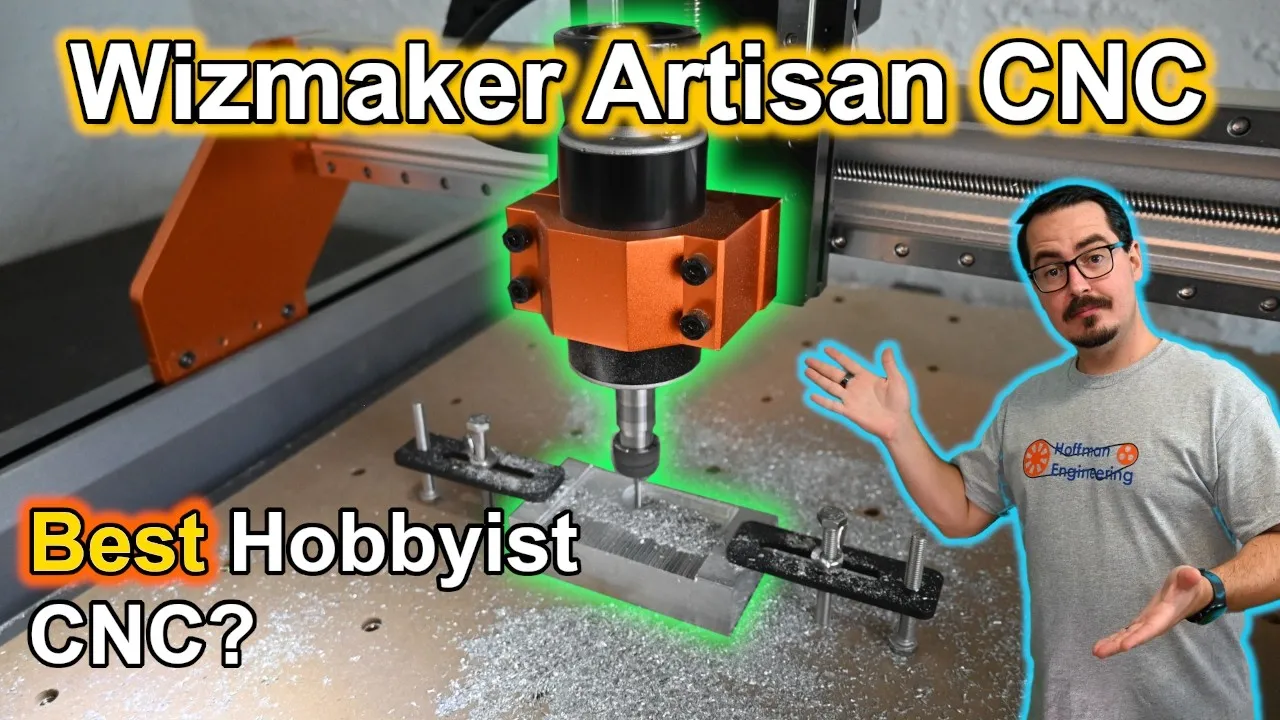
The bed is an MDF spoilboard with threaded inserts, and four clamps come in the box. For wood I mostly skipped the clamps and used XFasten double-sided tape. It held well and doesn’t take up vertical space the way a clamp does.
For aluminum I used the included clamps. They held for most of my cuts, but on one of them the adaptive toolpath looped back and crossed itself, the side load shifted the part, and the cut was ruined. That one was on me. I should have secured it harder or used the optional Wizmaker vise. If you plan on aluminum work, the vise bundle is the first upgrade I’d point to.
There’s also an adjustable work light on the gantry. It’s a small thing that makes it much easier to see what’s happening during a cut.
Hand-Wheel Control Panel and Tool Setter
The control panel is one of my favorite parts of this machine. It’s a hand-wheel pendant with a small screen and three dials. One selects the axis, one selects the jog increment, and the big wheel moves the machine in either direction. Switching axes is fast and positioning a bit feels natural.
It also has a center-point calculator that I used on almost every project. Jog the bit to two opposite edges of your stock, press calculate, and the controller finds the center and moves there.
The panel attaches to its stand with magnets. They’re on the weak side, and with the cord pulling on it the panel won’t stay upright. I ended up setting it down sideways.
The automatic tool setter is included too. Plug it in, clip the alligator clip to your bit, set the block on top of your material and press the TS button. The Z axis probes down until the bit touches the setter, and the controller zeroes Z to the top of the material. It worked with every bit I tried.
Dust Collection
This is where the base machine falls short. There’s no dust boot or chip removal included, so chips pile up as you cut. I cleaned up with a shop vac between operations. It works, but it doesn’t help during the cut.
Wizmaker sells a CNC Dust Collector Kit, a dual-stage cyclone and HEPA system with a dust boot for the spindle. I didn’t have one to test, so I can’t tell you how well it works. If you’ll run this machine regularly, it’s worth budgeting for, and there’s a bundle with the vise and dust collector.
GRBL Software and CAM
The Artisan 01 runs a GRBL-based controller. It works with GRBL-compatible senders like Candle, UGS and IO Sender, and with LightBurn for the laser mode. I used Universal Gcode Sender. The connection was solid, jogging was smooth, and no job dropped out mid-cut.
For toolpaths I used two CAM packages. Kiri:Moto is free, runs in the browser and plugs into Onshape, my preferred CAD program. Autodesk Fusion 360 is also free for personal use and has a much deeper feature set, including adaptive clearing, better tool libraries and simulation. Both worked well with the machine. If you’re new to CNC, I’d point you toward Fusion 360. The learning curve is steeper, but the toolpath strategies pay off, especially in harder materials.
Assembly: About 30 Minutes
The Artisan 01 ships mostly assembled. The frame, the motion system and the wiring inside the cable chains are already done. I attached the X-axis assembly, screwed on the cable chains and plugged in a few connectors. That took about 30 minutes. There were no rails to square up and no belts to tension.
Test Cuts: Poplar, Oak and Aluminum
Poplar cut easily. I ran a 1/8 inch two-flute high-speed steel end mill at 1000mm/min. The cut edges came out a little stringy, which is how poplar behaves. Sanding cleaned it up.
Oak is harder and denser, and the machine was right at home in it. My first test used the poplar settings with toolpaths from Kiri:Moto, and the 300W spindle had no trouble. So I moved to Fusion 360 and took much more aggressive passes, with a deeper depth of cut and a higher optimal load on an adaptive toolpath. The chips came off cleanly and the finish was sharp right off the machine. Hardwood signs, jigs and boxes are the work this CNC is built for.
I also ran a contour engraving of two fish with a 1/8 inch high-speed steel ball-end mill at a 15% stepover. It took a little over 30 minutes and came out nicely.
Aluminum is where the 300W spindle shows its limits. I broke a number of bits dialing in feeds and speeds. My 1/8 inch two-flute high-speed steel end mills aren’t made for aluminum, and a single-flute or O-flute would have done better. They did work on aluminum bar stock once I slowed everything down: a 2D adaptive toolpath at 230mm/min with a 3mm depth of cut.
So can the Wizmaker Artisan 01 cut aluminum? Yes, but slowly. The gantry and linear guides are solid, and the spindle is the weak point. It’ll get you a custom bracket or a one-off fixture. It isn’t a production aluminum machine.
The One Y-Axis Issue
Very early in testing, I homed the machine after powering it on and the Y axis made a loud grinding sound, as if the motor didn’t have the torque to move. I powered down, restarted and homed again, and it worked. Every home cycle in the month since has been fine. My best guess is that the Y-axis lead screw needed to move and spread its lubrication after assembly.
Verdict: Should You Buy the Wizmaker Artisan 01?
The Wizmaker Artisan 01 is a solid desktop CNC for the price. What stood out to me were the dual-nut lead screws on every axis, the true ER11 collet, the control panel with its center-point calculator, and the included automatic tool setter. Because it ships mostly assembled, you can be cutting in well under an hour.
The 300W version makes sense if you’re mostly cutting wood, plastic and the occasional small aluminum part. If aluminum or denser materials are your main use, the 500W version is $100 more, and the spindle kit installs in about 10 minutes if you decide to add it later. The drawbacks are manageable: the clamps are basic, so a proper vise is a wise upgrade, and there’s no dust boot, so plan for dust collection.
If you want to run aluminum production all day, this isn’t your machine, and at this price it isn’t built to be. For a hobbyist or small-shop maker who wants a rigid, accurate desktop CNC that’s easy to set up, it’s a great fit. Aside from the one Y-axis grinding noise that never returned, nothing in a month of testing would stop me from recommending it.
Check the latest price on the Wizmaker Artisan 01
Pros and cons
✓ Pros
- Dual-nut lead screws on every axis, and motion felt tight and consistent through a month of testing
- True ER11 collet, so real ER11 collets in other sizes seat properly
- Hand-wheel control panel with a built-in center-point calculator
- Automatic tool setter included, and it worked with every bit tested
- Ships mostly assembled. About 30 minutes from box to ready
- 420 x 420mm work area with 90mm of Z travel
- Oak cut cleanly, even with aggressive adaptive toolpaths from Fusion 360
- Adjustable work light on the gantry
✗ Cons
- The 300W spindle cuts aluminum only at slow feeds. 230mm/min at a 3mm depth of cut in testing
- No dust boot or chip removal in the base package
- Included clamps are basic, and an aluminum workpiece shifted in them during an adaptive cut
- Control panel magnets are weak, so it won't stay upright on the stand with the cord pulling on it
- One Y-axis grinding noise while homing early in testing. It never came back
- Lead screws mean slower max speeds than a belt-driven CNC
Specs
| Machine Type | 3-axis desktop CNC router |
|---|---|
| Work Area | 420 x 420mm |
| Z Travel | 90mm |
| Spindle | 300W (500W version and upgrade kit available) |
| Max Spindle Speed | 12,000 RPM |
| Spindle Body Diameter | 52mm |
| Radial Runout (rated) | 0.01 to 0.03mm |
| Collet | ER11 (1/8" collet included) |
| Linear Motion | MGH12 linear guides on X and Z, 16mm linear shaft on Y |
| Lead Screws | T8 dual-nut on X and Z, T12 dual-nut on Y |
| Frame | Aluminum, mostly pre-assembled |
| Net Weight | 26.8kg (a little under 60 lbs) |
| Bed | MDF spoilboard with threaded inserts, 4 clamps included |
| Controller | GRBL-based, with a hand-wheel control panel |
| Tool Setter | Automatic tool setter included |
Where to buy
- Wizmaker Artisan 01 300W (CNC Only, Wizmaker Store)$599 →
- Wizmaker Artisan 01 300W (Amazon)Check price →
- Wizmaker Artisan 01 500W (CNC Only, Wizmaker Store)$699 →
- Wizmaker Artisan 01 500W (Amazon)Check price →
- Artisan 01 300W + Vise Bundle$639 →
- Artisan 01 300W + Vise + Dust Collector Bundle$739 →
- Artisan 01 300W + Vise + 4th Axis Bundle$789 →
- Artisan 01 300W All-In-One Bundle$899 →
- XFasten Double Sided TapeCheck price →
- Genmitsu 40pcs End MillsCheck price →
- Aluminum Bar StockCheck price →
Prices may have changed since this review.
FAQ
Can the Wizmaker Artisan 01 cut aluminum?
Yes, but slowly with the 300W spindle. With 1/8 inch two-flute high-speed steel end mills, a 2D adaptive toolpath ran at 230mm/min with a 3mm depth of cut, after breaking a number of bits finding those settings. It's fine for a custom bracket or a one-off fixture, not for production aluminum work.
Is the Wizmaker Artisan 01 worth it?
For a hobbyist or small-shop maker cutting mostly wood and plastic, yes. At $599 you get dual-nut lead screws on every axis, a true ER11 collet, an automatic tool setter and a hand-wheel control panel, and it's cutting in well under an hour. Budget for a vise and dust collection, since the base package has basic clamps and no dust boot.
Should you buy the 300W or the 500W Artisan 01?
The 300W spindle is the right choice if you're mostly cutting wood, plastic and the occasional small aluminum part. If aluminum or denser materials are your main use, the 500W version is $100 more. Wizmaker also sells the 500W spindle as an upgrade kit that installs in about 10 minutes, so you can start with the 300W and upgrade later.
What software works with the Wizmaker Artisan 01?
It uses a GRBL-based controller, so it works with GRBL-compatible senders like Candle, UGS and IO Sender, plus LightBurn for the laser mode. This review used Universal Gcode Sender, with toolpaths from Kiri:Moto and Autodesk Fusion 360. Both CAM packages worked well with the machine.
How long does the Wizmaker Artisan 01 take to assemble?
About 30 minutes. The frame, the motion system and the wiring inside the cable chains come done. You attach the X-axis assembly, screw on the cable chains and plug in a few connectors.
This Wizmaker Artisan 01 was provided by Wizmaker for review. This post contains affiliate links. If you purchase through them, I may earn a small commission at no extra cost to you. All opinions are my own.